
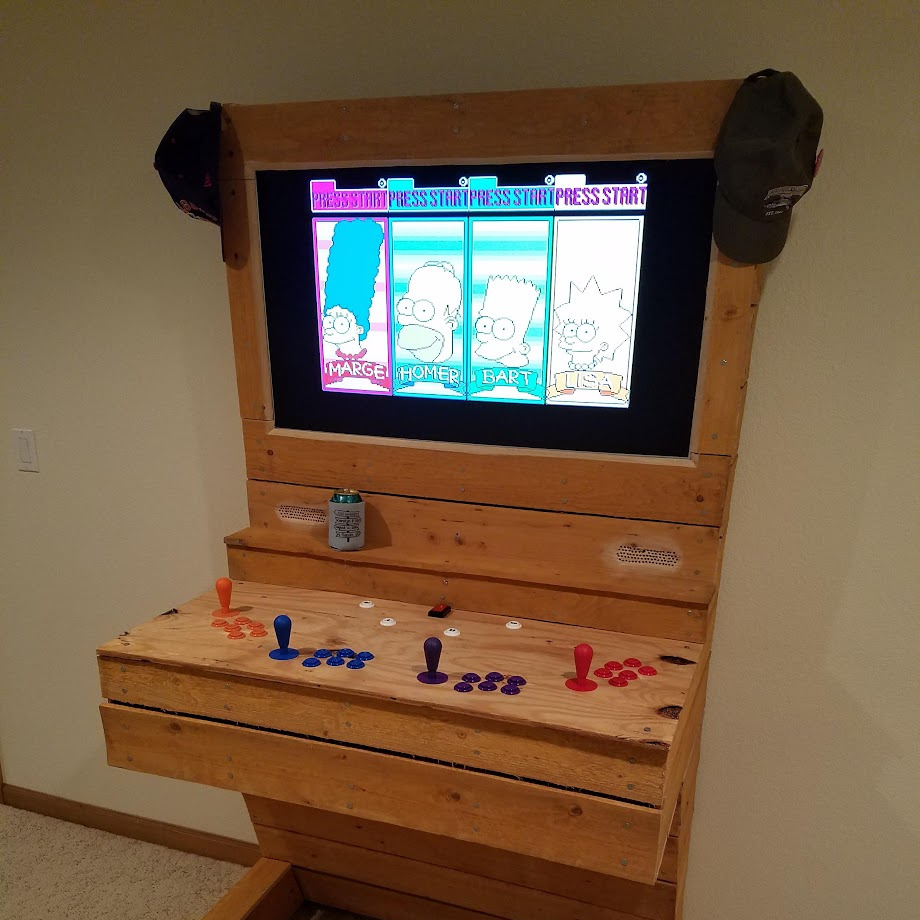
This is always something I wanted to try and do myself, build a full blown arcade. I had an old metal framed desk, a Raspberry Pi, and looking at the two together I decided to give it a shot. I did my research on the different types of operating systems available to run the arcade, the buttons, joysticks, and controllers available to me in order to put everything together. After investigation I decided to go with some typical American style joysticks and buttons that I picked up from Paradise Arcade Shop along with a PCB for connecting it all. I went with the I-PAC 4 interface for the PCB as my favorite arcade games growing up were a lot of 4 players games, The Simpsons, TMNT, and X-Men. Once I got all the pieces I went ahead and did a small scale proof of concept to familiarize myslef with all the componants and to make sure I could get the Raspberry Pi working properly. I went with RetroPie as my operating system for the Pi and it really was quite simple to install and then configure to use with my PCB and add in some games/ROMs to use for testing. I used a wooden box with some carboard on top to test out 1 player and my wife and I were off playing Pac Man! Now that I knew everything worked it just came down to putting everything together. We had an extra TV that I took all the plastic componants off and stripped down to the metal frame. I build a wooden frame around the TV to make it easier to mount to the rest of the structure I was planning on building. For that wooden frame I used some scrap wood I had around the house, and I knew I wanted the Arcade to look rustic, something that would catch your eye at a dive bar with cheap beer. In order to accomplish that I went with cedar fencing to finish the outside. It was the best bang for my buck to skin everything plus it smells nice and was easy to work with. As things got built out I had originally wanted to get a piece of live edge wood to do the top for the buttons. I had some old plywood laying around and decided to use that instead to keep costs down. The live edge wood is something I would still like to add. I used the carboard from the POC build to mark off all the button locations, and drilled out all the required holes. After mounting everything it was time to start wiring it all up. I had some old rolls of ethernet cable, a lot was already seperated. I liked this because I got 8 strands of different color copper to use and there were a lot of strands to run. While I was cabling everything I also used a label maker to add stickers to each wire so that I could reference what went where easily as well. Now that everything was wired up, it was time to wrap up the build. I attached the button top and did a little finish work and we were ready to play. I enjoyed building this way more than I have enjoyed playing it. It's been great at parties when friends come over as 4 people can play some really fun games for free. Overall I'm really happy I finally built this Arcade and that I now have it for years to come. As our kids grow I think it will get used more and more.


